The web developer tools

Prepare and secure the work environment for a web developer based on Apache, MySQL, PHP and phpMyAdmin. Be ready to encrypt connections with SSL. Configure a local mail server with Postfix and Dovecot. Manage putting a website online with SSH and Rsync. Watch its activity with Nagios. Maintain the source code with Git. Program incremental backups. Limit disk space usage with quotas. Set up a local name server with Bind.
- LAMP
- Apache
- PHP
- MySQL
- phpMyAdmin
- Encryption
- Local mail
- Remote access
- Source management
- Synchronization
- Supervision
- Backups
- Quotas
- DNS
- NTP
LAMP
Install Apache, MySQL and PHP:
$ sudo apt install apache2
$ sudo apt install mysql-client mysql-server
$ sudo apt install php5 php5-mcrypt php5-gd libapache2-mod-php5 php5-mysql
During the installation of MySQL, choose a password for the DB administrator. Write it down.
Apache
Make sure the Apache server is running:
$ sudo /etc/init.d/apache2 startCheck that Apache is operational by entering localhost in the address bar of your navigator. If the connection with the server is rejected, the cause is in the error log /var/log/apache2/error.log.
Create the file /etc/apache2/httpd.conf with the following content:
- #
- # ServerAdmin: Your address, where problems with the server should be
- # e-mailed. This address appears on some server-generated pages, such
- # as error documents. e.g. admin@your-domain.com
- #
- ServerAdmin webmaster@localhost
- #
- # ServerName gives the name and port that the server uses to identify itself.
- # This can often be determined automatically, but we recommend you specify
- # it explicitly to prevent problems during startup.
- #
- # If your host doesn't have a registered DNS name, enter its IP address here.
- #
- #ServerName www.example.com:80
- ServerName localhost
If necessary, add the following lines to the file /etc/apache2/apache2.conf before the line Include ports.conf:
# Include all the user configurations:
Include httpd.conf
Edit the configuration file /etc/apache2/sites-available/default.
Set the directive AllowOverride to all in the configuration of the directory /var/www:
- <Directory /var/www/>
- Options Indexes FollowSymLinks MultiViews
- AllowOverride All
- Order allow,deny
- allow from all
- </Directory>
IMPORTANT: Since Apache 2.4, you must add the directive Require all granted.
Notify the change to the Apache server:
$ sudo /etc/init.d/apache2 reloadAdd your account to the group www-data:
$ sudo adduser frasq www-dataNOTE: replace frasq by your account name.
Create the folder /var/www/frasq.org:
$ sudo mkdir /var/www/frasq.org
$ sudo chgrp www-data /var/www/frasq.org
$ sudo chmod 2775 /var/www/frasq.org
NOTE: replace frasq.org by the domain name of your site.
Create the file frasq in the directory /etc/apache2/sites-available with the following content:
- <VirtualHost *:80>
- DocumentRoot /var/www/frasq.org
- ServerName local.frasq.org
- </VirtualHost>
Create a link to the file /etc/apache2/sites-available/frasq in the directory /etc/apache2/sites-enabled:
$ cd /etc/apache2/sites-enabled
$ sudo ln -s ../sites-available/frasq frasq
Restart Apache:
$ sudo /etc/init.d/apache2 restartAlternatively:
$ sudo a2ensite frasq
$ sudo systemctl reload apache2
Associate the name local.frasq.org to the local IP address by adding the following line to the file /etc/hosts:
127.0.0.1 local.frasq.orgCheck that the DNS is working:
$ ping local.frasq.org
PING local.frasq.org (127.0.0.1) 56(84) bytes of data.
64 bytes from localhost (127.0.0.1): icmp_seq=1 ttl=64 time=0.030 ms
^C
Enter local.frasq.org in the address bar of your navigator to check that the virtual site is accessible.
PHP
Edit the configuration file of PHP for Apache /etc/php5/apache2/php.ini.
Look for the parameter session.gc_maxlifetime. Give it the following value:
session.gc_maxlifetime = 3600Create the file /var/www/frasq.org/phpinfo.php with the following content:
Enter local.frasq.org/phpinfo.php in the address bar of your navigator to check the installation of PHP.
MySQL
Make sure the MySQL server is running:
$ sudo /etc/init.d/mysql startIMPORTANT: If the installation of MySQL didn't ask you to define a password for the DB administrator, do it immediately:
$ sudo -s
# mysql -u root
mysql> ALTER USER 'root'@'localhost' IDENTIFIED WITH caching_sha2_password BY 'root_password';
mysql> FLUSH PRIVILEGES;
Replace root_password by a password of your choice. Don't forget it.
Edit the configuration file /etc/mysql/mysql.conf.d/mysqld.cnf. Check the parameter bind-address:
bind-address = 127.0.0.1Your DB is protected from a remote connection.
Check that the DB administrator is protected and accessible:
$ mysql -u root -p
Enter password:
Enter the password for root.
Welcome to the MySQL monitor.  Commands end with ; or \g.
mysql>
Try to run a command:
mysql> show databases;
+--------------------+
| Database           |
+--------------------+
| information_schema |
| mysql              |
| performance_schema |
| sys                |
+--------------------+
4 rows in set (0.00 sec)

mysql>
Enter quit to quit mysql.
If you have forgotten the password of the DB administrator, begin by stopping the server:
$ sudo /etc/init.d/mysql stopRestart the server in the mode which gives free access without passwords to all users while granting them all privileges:
$ sudo mysqld_safe --skip-grant-tables &Run mysql as root:
$ mysql -u root --skip-passwordmysql> ALTER USER 'root'@'localhost' IDENTIFIED WITH caching_sha2_password BY 'root_password';
mysql> quitroot_password by a password of your choice.
Stop the server:
$ sudo pkill -9 mysqld_safe
[1]+  Process killed      sudo mysqld_safe --skip-grant-tables
Restart the server in normal mode:
$ sudo /etc/init.d/mysql startCheck that the DB is protected and accessible:
$ mysql -u root -p
Enter password:
phpMyAdmin
NOTE: Adminer is an alternative to phpMyAdmin.
$ sudo apt install adminerTo install the latest version:
$ sudo mkdir /usr/share/adminer
$ sudo wget "http://www.adminer.org/latest.php" -O /usr/share/adminer/latest.php
$ sudo ln -s /usr/share/adminer/latest.php /usr/share/adminer/adminer.php
$ echo "Alias /adminer /usr/share/adminer/adminer.php" | sudo tee /etc/apache2/conf-available/adminer.conf
$ sudo a2enconf adminer
$ sudo service apache2 reload
Enter localhost/adminer in the address bar of your navigator.
To install phpMyAdmin:
$ sudo apt install phpmyadminDuring the installation, select Apache by pressing the space bar then a tab and Enter, select apache2 for the server, validate the configuration with dbconfig-common, enter root for the name of the DB administrator then the password you have specified for the user root of MySQL.
The installation has created a link to the file /etc/phpmyadmin/apache.conf in the folder /etc/apache2/conf-enabled. NOTE: For an older version of Apache, the link is created in the folder /etc/apache2/conf.d.
Activate the module php5-mcrypt:
$ sudo php5enmod mcryptEdit the configuration file of the DB access parameters of PHP /etc/phpmyadmin/config-db.php. Write down the password of the DB user:
$dbuser='phpmyadmin';
$dbpass='************';
Edit the configuration file of PHP /etc/phpmyadmin/config.inc.php.
Check that the authentication type is properly set to 'cookie':
$cfg['Servers'][$i]['auth_type'] = 'cookie';IMPORTANT: This parameter determines how phpMyAdmin will connect to the DB. The value 'cookie' forces the display of an identification page. The mode 'config' which gives a direct access to the DB is to be banned.
Edit the configuration of phpMyAdmin for Apache /etc/phpmyadmin/apache.conf. Modify the path to phpMyAdmin:
#Alias /phpmyadmin /usr/share/phpmyadmin
Alias /mysql /usr/share/phpmyadmin
Block the access to the directory /usr/share/phpmyadmin/setup :
<Directory /usr/share/phpmyadmin/setup>
    Order Deny,Allow
    Deny from All
</Directory>
Notify Apache of the change:
$ sudo /etc/init.d/apache2 reloadEnter localhost/mysql in the address bar of your navigator.
Login as root. Enter the password of the DB administrator.
Click on the DB mysql then on the table user.
For security reasons, delete all the entries except the one with user set to root and host to localhost.
Insert an entry for phpMyAdmin with user set to phpmyadmin, host to localhost, password to the value of the password defined by the parameter $dbpass of the file /etc/phpmyadmin/config-db.php.
Don't give any privileges to phpmyadmin.
Only root has the right to execute all operations on all the databases.
IMPORTANT: Remember to select the PASSWORD function for the password field or the value will not be encrypted and the password typed in the identification page, which is encrypted, will never match. Be particularly cautious if your are changing the password of root.
Click on the db table in the mysql DB.
Insert an entry for phpMyAdmin with user set to phpmyadmin, host to localhost and db to phpmyadmin and all the privileges.
Restart MySQL:
$ sudo /etc/init.d/mysql restartIMPORTANT: Never give global privileges to a user, except user.
Always grant privileges, and just the necessary ones, to a particular user on a specific database. Try to avoid remote connection if possible.
Encryption
Install OpenSSL:
$ sudo apt install opensslCreate a folder called SSL in your personal directory:
$ mkdir ~/SSLProtect it:
$ chmod 700 ~/SSLCopy the configuration file /etc/ssl/openssl.cnf in your SSL folder:
$ cp /etc/ssl/openssl.cnf ~/SSLGo in your SSL folder:
$ cd ~/SSLCreate the folders private, certs and newcerts and protect them:
$ mkdir private certs newcerts
$ chmod 700 private certs newcerts
Create the index:
$ touch index.txt
$ chmod 664 index.txt
Edit the file openssl.cnf and change the following lines:
dir             = .                     # Where everything is kept

new_certs_dir   = $dir/newcerts         # default place for new certs.

default_days    = 3650                  # how long to certify for

stateOrProvinceName             = optional

countryName_default             = FR

stateOrProvinceName_default     =

0.organizationName_default      = frasq.org

organizationalUnitName_default  = Software

#nsComment                      = "OpenSSL Generated Certificate"
nsComment                       = "Generated by frasq.org"

nsCertType                      = server
Other default options:
[ req ]
default_bits            = 2048
default_md              = sha256
NOTE: Adapt this file by replacing frasq.org by the domain name of the site, by changing the default life time of a certificate, the designation of the origin of the certificates, etc.
IMPORTANT: The option nsCertType of the section [usr_cert] depends on the desired extension.
Use server to generate a server certificate.
Use client, email to generate the user certificate containing an email address.
Certification authority
Begin by creating the certificate of your certification authority:
$ openssl req -config ./openssl.cnf -newkey rsa:2048 -sha256 -keyout private/cakey.pem -out cacert-req.pemEnter the following answers to the questions:
organizationName          = frasq.org
organizationalUnitName    = http://www.frasq.org
commonName                = Frasq Signing Authority
emailAddress              = keymaster@frasq.org
Check the content of the file:
$ openssl req -in cacert-req.pem -text -noout
...
Subject: C=FR, L=La Chapelle, O=frasq.org, OU=http://www.frasq.org, CN=Frasq Signing Authority/emailAddress=keymaster@frasq.org
...
Public-Key: (2048 bit)
...
Signature Algorithm: sha256WithRSAEncryption
...
Create a self-signed root certificate:
$ openssl ca -config ./openssl.cnf -create_serial -selfsign -extensions v3_ca -keyfile private/cakey.pem -md sha256 -out cacert.pem -days 3650 -infiles cacert-req.pemThe parameter -md sha256 generates a SHA2 certificate.
The option -days 3650 creates a certificates valide for 10 years.
The parameter -create_serial initializes the file serial.
Check the content of the certificate:
$ openssl x509 -in cacert.pem -text -noout
...
Signature Algorithm: sha256WithRSAEncryption
Issuer: C=FR, L=La Chapelle, O=frasq.org, OU=http://www.frasq.org, CN=Frasq Signing Authority/emailAddress=keymaster@frasq.org
...
Subject: C=FR, L=La Chapelle, O=frasq.org, OU=http://www.frasq.org, CN=Frasq Signing Authority/emailAddress=keymaster@frasq.org
...
X509v3 Basic Constraints:
        CA:TRUE
...
Notice that the fields Issuer and Subject are identifical and that the field X509v3 Basic Constraints is set to CA:TRUE.
Server certification
Create the certificate request for the online site:
$ openssl req -config ./openssl.cnf -new -nodes -newkey rsa:2048 -sha256 -out frasq.org-req.pem -keyout private/frasq.org-key.pemCombining the options -new -nodes generates a private key which is not protected. This way Apache will be able to load it without asking for a passphrase.
Enter the following answers to the questions:
organizationName          = frasq.org
organizationalUnitName    = Software
commonName                = www.frasq.org
emailAddress              = webmaster@frasq.org
Check that the option nsCertType in the [usr_cert] section of the configuration file openssl.cnf is set to server:
[ usr_cert ]

# These extensions are added when 'ca' signs a request.
...
# This is OK for an SSL server.
nsCertType			= server
Display the request:
$ openssl req -in frasq.org-req.pem -text -noout
...
Subject: C=FR, L=La Chapelle, O=frasq.org, OU=Software, CN=www.frasq.org/emailAddress=webmaster@frasq.org
...
The field CN must contain the address of the site. Sign the request to build the certificate:
$ openssl ca -config ./openssl.cnf -out frasq.org-cert.pem -infiles frasq.org-req.pemCheck the content of the certificate:
$ openssl x509 -in frasq.org-cert.pem -text -noout
...
Issuer: C=FR, L=La Chapelle, O=frasq.org, OU=http://www.frasq.org, CN=Frasq Signing Authority/emailAddress=keymaster@frasq.org
...
Subject: C=FR, O=frasq.org, OU=Software, CN=www.frasq.org/emailAddress=webmaster@frasq.org
...
X509v3 Basic Constraints:
        CA:FALSE
Netscape Cert Type:
        SSL Server
...
Create a certificate for localhost:
$ openssl req -config ./openssl.cnf -new -nodes -newkey rsa:2048 -sha256 -out localhost-req.pem -keyout private/localhost-key.pem
...
organizationName          = frasq.org
organizationalUnitName    = Software
commonName                = localhost
emailAddress              = webmaster@localnet.net
...
$ openssl ca -config ./openssl.cnf -md sha256 -out localhost-cert.pem -infiles localhost-req.pem
To create a certificate which is valid for several variants of a domain name, e.g. sitename.net, www.sitename.net and local.sitename.net, add the following lines at the end of the file openssl.cnf:
[ san_ext ]

subjectAltName = @subject_alt_names

[ subject_alt_names ]
DNS.1 = ${ENV::CN}
DNS.2 = www.${ENV::CN}
DNS.3 = local.${ENV::CN}
The parameter ${ENV::CN} uses the value of the environment variable CN.
Create the certificate request as usual while configuring the environment variable CN to the domain name of the site:
$ CN=sitename.net openssl req -config ./openssl.cnf -new -nodes -newkey rsa:2048 -sha256 -out sitename-req.pem -keyout private/sitename-key.pem
...
organizationName          = sitename.net
organizationalUnitName    = Web
commonName                = sitename.net
emailAddress              = webmaster@sitename.net
...
To sign the certificate while activating this extension, type the following command:
$ CN=sitename.net openssl ca -config ./openssl.cnf -md sha256 -extensions san_ext -out sitename-cert.pem -infiles sitename-req.pemCheck the content of the certificate:
$ openssl x509 -in sitename-cert.pem -text -noout
...
     X509v3 extensions:
            X509v3 Subject Alternative Name:
DNS:sitename.net, DNS:www.sitename.net, DNS:local.sitename.netIMPORTANT: Since version 58, Chrome requires SSL certificates to use SAN (Subject Alternative Name) and support for the Common Name (CN) has been removed.
Client certification
Edit the file openssl.cnf and set the option nsCertType of [usr_cert] section to the value client, email:
[ usr_cert ]
...
# This is OK for an SSL server.
#nsCertType			= server
...
# For normal client use this is typical
nsCertType = client, email
...
Create a request for a client certificate with the email address webmaster@frasq.org:
$ openssl req -config ./openssl.cnf -new -nodes -newkey rsa:2048 -sha256 -out webmaster-req.pem -keyout private/webmaster-key.pemEnter the following answers to the questions:
organizationName          = frasq.org
organizationalUnitName    = Software
commonName                = webmaster
emailAddress              = webmaster@frasq.org
Create the certificate:
$ openssl ca -config ./openssl.cnf -out webmaster-cert.pem -infiles webmaster-req.pemCreate a certificate in the PKCS12 format:
$ openssl pkcs12 -export -out webmaster-cert.p12 -in webmaster-cert.pem -inkey private/webmaster-key.pem -name "webmaster" -caname "Frasq Signing Authority" -certfile cacert.pemThis format is accepted by Mozilla and Windows applications.
Apache
Create the links to the files /etc/apache2/mods-available/ssl.load and /etc/apache2/mods-available/ssl.conf in the directory /etc/apache2/mods-enabled:
$ cd /etc/apache2/mods-enabled
$ sudo ln -s ../mods-available/ssl.load .
$ sudo ln -s ../mods-available/ssl.conf .
Install the certificate of the certification authority:
$ cd ~/SSL
$ sudo cp cacert.pem /etc/ssl/certs/frasq.crt
$ cd /etc/ssl/certs; sudo ln -s frasq.crt `openssl x509 -in frasq.crt -noout -subject_hash`.0
The last command links the certificate file to a file whose name is the hash of the certificate subject with the extension .0.
Install the certificate of the server localhost:
$ sudo cp localhost-cert.pem /etc/ssl/certs/localhost.crtInstall the server's key:
$ cd ~/SSL
$ sudo cp private/localhost-key.pem /etc/ssl/private/localhost.key
$ sudo chmod 640 /etc/ssl/private/localhost.keyIMPORTANT: Make sure the key isn't readable by everyone or Apache will refuse to read it.
Edit the file /etc/apache2/sites-available/default-ssl. Replace the following lines:
    #SSLCertificateFile    /etc/ssl/certs/ssl-cert-snakeoil.pem
    #SSLCertificateKeyFile /etc/ssl/private/ssl-cert-snakeoil.key
    SSLCertificateFile    /etc/ssl/certs/localhost.crt
    SSLCertificateKeyFile /etc/ssl/private/localhost.key
Uncomment the following line:
SSLCACertificatePath /etc/ssl/certs/Create a link to the file /etc/apache2/sites-available/default-ssl in the directory /etc/apache2/sites-enabled:
$ cd /etc/apache2/sites-enabled
$ sudo ln -s ../sites-available/default-ssl 001-default-ssl
Restart Apache:
$ sudo /etc/init.d/apache2 restartIn case of a problem, look for the cause in the error log /var/log/apache2/error.log.
Firefox & Thunderbird
Install the certificate of your certification authority by choosing Advanced then Encryption in Preferences, then View Certificates, Authorities and Import. Open the file cacert.pem in your folder ~/SSL.
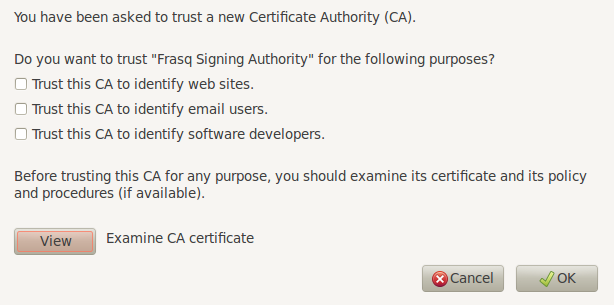
Check the confirmation boxes and validate.
NOTE: Click on View and check the SHA1 fingerprint of the certificate which you can obtain with the following command:
$ openssl x509 -in cacert.pem -fingerprint -nooutEnter https://localhost in the address bar to check that everything is in place.
Install the personal certificate of the webmaster by choosing Advanced then Encryption in Preferences, then View Certificates, Your Certificates and Import. Open the file webmaster-cert.p12 in your folder ~/SSL.
Repeat the installation procedures of the certificate of your certification authority and of the personal certificate of the webmaster in Thunderbird.
Windows
Copy the file cacert.pem of your folder ~/SSL while renaming it cacert.crt. Double-click on cacert.crt and follow the default options of the installation procedure. To install the personal certificate of the webmaster, double-click on webmaster-cert.p12 and validate the default options.
Protect phpMyAdmin
Edit the configuration file of phpMyAdmin for Apache /etc/phpmyadmin/apache.conf. Comment out the Alias directive:
#Alias /phpmyadmin /usr/share/phpmyadmin
#Alias /mysql /usr/share/phpmyadmin

<Directory "/usr/share/phpmyadmin">
...
Check that phpMyAdmin doesn't answer anymore at the addresses http://localhost/phpmyadmin and http://localhost/mysql.
Edit the configuration file of the default SSL site /etc/apache2/sites-available/default-ssl.
Add the following lines:
<VirtualHost _default_:443>
...
    Alias /mysql /usr/share/phpmyadmin

    <Directory "/usr/share/phpmyadmin">
        SSLVerifyClient require
        SSLRequire (%{SSL_CIPHER} !~ m/^(EXP|NULL)/ \
                    and %{SSL_CLIENT_S_DN_O} eq "frasq.org"\
                    and %{SSL_CLIENT_S_DN_CN} in {"webmaster"})
        #SSLCACertificateFile /etc/ssl/certs/frasq.crt
    </Directory>
...
The require option of the SSLVerifyClient directive forces the exchange of a client certificate with the server.
The SSLRequire directive checks that the transmitted certificate has been signed by frasq.org and established for the name webmaster.
Adapt this parameter by replacing frasq.org with the name of your certification authority.
Notify Apache:
$ sudo /etc/init.d/apache2 reloadEnter https://localhost/mysql in the address bar of your navigator to have access to phpMyAdmin. Check that if you remove the webmaster's certificate from Firefox, phpMyAdmin is not accessible.
Virtual sites
To associate a local URL to a virtual site in HTTPS, create a key and a certificate with the field commonName to the name of the server, e.g. local.frasq.org, and copy the key in the folder /etc/ssl/private and the certificate in the folder /etc/ssl/certs.
Add a file called frasq-ssl in the directory /etc/apache2/sites-available with the following contents:
<VirtualHost *:443>
DocumentRoot /var/www/frasq.org
ServerName local.frasq.org
SSLEngine On
SSLCertificateFile /etc/ssl/certs/local.frasq.org.crt
SSLCertificateKeyFile /etc/ssl/private/local.frasq.org.key
</VirtualHost>
</IfModule>
Create a link to the file /etc/apache2/sites-available/frasq-ssl in the directory /etc/apache2/sites-enabled:
$ cd /etc/apache2/sites-enabled
$ sudo ln -s ../sites-available/frasq-ssl frasq-ssl
Edit the file /etc/apache2/sites-available/default-ssl. Replace the following line:
#<VirtualHost _default_:443>
<VirtualHost *:443>
Edit the file /etc/apache2/ports.conf and add a directive NameVirtualHost *:443:
Listen 80
<IfModule mod_ssl.c>
# If you add NameVirtualHost *:443 here, you will also have to change
# the VirtualHost statement in /etc/apache2/sites-available/default-ssl
# to <VirtualHost *:443>
# Server Name Indication for SSL named virtual hosts is currently not
# supported by MSIE on Windows XP.
NameVirtualHost *:443
Listen 443
</IfModule>
Notice the comment about the directive <VirtualHost *:443> in the file default-ssl.
Restart Apache:
$ sudo /etc/init.d/apache2 restartEnter https://local.frasq.org in the address bar of your navigator.
Emailing
Install Postfix, the POP server of Dovecot and the mailx command:
$ sudo apt install postfix dovecot-pop3d bsd-mailxTake the option Internet with a smarthost when the installation of Postfix asks you to choose a type of configuration.
Enter localnet.net for the domain name.
Complete the configuration with the name of the SMTP server of your ISP or smtp.gmail.com by default.
Postfix
Check that the file /etc/mailname has the following content:
localnet.netEdit the file /etc/postfix/main.cf.
Look for the parameter myorigin. Add the following line:
myorigin = /etc/mailnameLook for the parameter mydestination. Give it the following value:
mydestination = localhost, localnet.net, localhost.localnet.netAssign the parameter relayhost the name or the IP address of the SMTP server of your ISP:
relayhost = smtp.gmail.comIMPORTANT: If your internet provider refuses to dispatch mails which are addressed to other domains, leave this field empty.
Check that the parameter mynetworks allows local connections, possibly remote ones:
mynetworks = 127.0.0.0/8 192.168.0.0/16 192.168.1.0/16Add the following line:
virtual_mailbox_base = /var/mailEdit the file /etc/aliases and redirect the local mail sent to root and to webmaster to your personal account:
root:		frasq
webmaster:	frasq
NOTE: Replace frasq by your connection name.
Restart the service:
$ sudo newaliases
$ sudo /etc/init.d/postfix restart
Try sending an email to yourself:
$ mailx frasq
Subject: Test
blahblah :-)
^D
Cc:
Replace frasq by your connection name. Press Ctrl-D to terminate the text of the message. Press Enter after Cc: to send it.
Read your email:
$ mailx
mailx
Mail version 8.1.2 01/15/2001.  Type ? for help.
"/var/mail/frasq": 1 message 1 new
>N  1 frasq@localnet.ne  Thu May 13 14:10   1/423   Test.
&
Enter the number of the message to display it:
& 1
Message 1:
From frasq@localnet.net  Thu May 13 14:10:09 2010
X-Original-To: frasq@localnet.net
To: frasq@localnet.net
Subject: Test.
Date: Thu, 13 May 2010 14:10:08 +0200 (CET)
From: frasq@localnet.net

blahblah :-)

&
Enter d to delete the message then q to quit mailx.
NOTE: If you haven't received the message, the reason is in the log /var/log/mail.log.
Try adding the domain @localnet.net to the address.
Check that sending an email outside to your public address is properly relayed to your internet provider.
If you don't receive the email, try not giving a value to the parameter relayhost in main.cf.
If the sendmail relay complains about IPv6 authentification (Gmail) and you can't configure your DNS properly, change the value of the parameter inet_protocols to ipv4.
Dovecot
Edit the file /etc/dovecot/conf.d/10-mail.conf.
Set the parameter mail_location to the following value:
mail_location = mbox:~/mail:INBOX=/var/mail/%uAssign the name of the group which is authorized to write in INBOX to the parameter mail_privileged_group:
mail_privileged_group=mailThunderbird
NOTE: Adapt the configuration of Thunderbird by replacing frasq by your local identifier.
Add an account Localhost to Thunderbird with frasq@localnet.net for the email address.
Postfix is the SMTP server in charge of outgoing messages. Dovecot is the POP3 server in charge of incoming messages.
Configure the incoming server for POP with localhost for the server's name and 110 for the port number. Enter frasq for the user's name.
Configure the outgoing server for SMTP with localhost for the server's name and 25 for the port number. Choose no security option.
Make sure the identity frasq@localnet.net is properly associated to the outgoing server localhost.
Read the mail for the Localhost account. Send a message with the identity frasq@localnet.net to frasq. Read the message.
In case of a problem, the cause is the error log /var/log/mail.log.
Managing the web site
Connection
Install OpenSSH:
$ sudo apt install openssh-client openssh-serverDisplay the fingerprint of your local server's public key:
$ ssh-keygen -l -f /etc/ssh/ssh_host_rsa_key.pub
2048 75:1b:e8:dd:95:ec:86:1e:fa:da:b3:58:e1:e8:b3:87 /etc/ssh/ssh_host_rsa_key.pub (RSA)
Try a local connection:
$ ssh localhost
The authenticity of host 'localhost (::1)' can't be established.
RSA key fingerprint is 75:1b:e8:dd:95:ec:86:1e:fa:da:b3:58:e1:e8:b3:87.
The program displays the fingerprint of the remote server. Check it then accept the connection:
Are you sure you want to continue connecting (yes/no)? yes
Warning: Permanently added 'localhost' (RSA) to the list of known hosts.
frasq@localhost's password:
Enter your password. You are connected. Enter logout to close the remote connection.
The file ~/.ssh/known_hosts contains the public keys of all the servers you have connected to:
$ cat ~/.ssh/known_hostsIf a server's key changes, the connection is rejected to protect you against attacks on IP addresses, DNS name resolutions and routing. If the change is legitimate, remove the old key from the file.
Generate a key pair:
$ ssh-keygen
Generating public/private rsa key pair.
Enter file in which to save the key (/home/frasq/.ssh/id_rsa):
Accept the proposed filename. Enter a rather long pass phrase with digits, small and capital letters, other characters like #, ~ and other @, some ponctuation, etc. Go in the folder ~/.ssh and list its content:
$ cd ~/.ssh
$ ls
id_rsa id_rsa.pub
id_rsa contains your private key, id_rsa.pub your public key. Make sure accessing your private key is protected:
$ chmod 700 ~/.ssh
$ chmod 600 ~/.ssh/id_rsa
$ chmod 644 ~/.ssh/id_rsa.pubIMPORTANT: Don't forget the pass phrase. NEVER give away your private key.
Edit the configuration file of the SSH server /etc/ssh/sshd_config and modify the following lines:
RSAAuthentication yes
AuthorizedKeysFile %h/.ssh/authorized_keys
#AuthorizedKeysFile /etc/ssh/authorized_keys/%u
PermitRootLogin no
PasswordAuthentication no

Compression yes

#AllowUsers frasq
PasswordAuthentication set to no forbids connections with an identification by password.
RSAAuthenticationset to yes activates the identification by RSA key.
Notify SSH:
IMPORTANT: Before you set the parameter PasswordAuthentication to no, make sure that the connection with a key is operational. During the setup, keep another terminal connected to the remote server.
$ /etc/init.d/ssh reloadTry to connect:
$ ssh localhost
Permission denied (publickey).
To allow a connection for a user, add his public key to the file ~/.ssh/authorized_keys:
$ cat ~/.ssh/id_rsa.pub >> ~/.ssh/authorized_keysConnect with your private key:
$ ssh localhostEnter the pass phrase which locks your private key. You are connected. Enter logout to close the remote connection.
To strickly control who is allowed to connect to a system, uncomment the line which sets AuthorizedKeysFile to /etc/ssh/authorized_keys/%u in /etc/ssh/sshd_config:
#AuthorizedKeysFile %h/.ssh/authorized_keys
AuthorizedKeysFile /etc/ssh/authorized_keys/%u
Create the directory /etc/ssh/authorized_keys:
$ sudo mkdir /etc/ssh/authorized_keysInstall your public key:
$ sudo cp ~/.ssh/id_rsa.pub /etc/ssh/authorized_keys/frasqThe name of the file has to match the connection name. Check the connection:
$ ssh localhostThe demon ssh-agent registers all the keys which have been unlocked.
Enter the command ssh-add -l to list them.
Enter the command ssh-add -D to empty the list.
To automatically use a specific key to connect to a machine, add the following lines in the file ~/.ssh/config:
Host frasq.org
HostName=frasq.org
IdentityFile=~/.ssh/frasq@frasq.org.pub
Managing the source code
Install Git:
$ sudo apt install git-coreCreate a group git and a user git. Add your identifier to the group git. Create a shared deposit:
$ sudo mkdir /git
$ sudo chown git:git /git
$ chmod 775 /git
$ sudo -u git bash
$ cd /git
$ umask 007
$ git clone --bare /www/frasq frasq.git
$ cd frasq.git
$ find . -type d -print0 | xargs -0 chmod 770
$ git config core.sharedrepository 1
$ git config receive.denyNonFastforwards true
^D
The core.sharedrepository flag tells Git to keep everything group readable and writable. The receive.denyNonFastforwards flag makes sure that merges can’t happen when you push to the deposit. You have to do the merges on your local machine before you can push the result.
Add the IP address of the Git server in /etc/hosts:
127.0.0.1 githostCreate a clone of the deposit in your work directory or directly at the root of the site:
$ cd /www
$ mv frasq frasq.old # make a backup copy
$ git clone ssh://githost/git/frasq.git frasq
$ cd frasq
$ git status
When the deposit changes, update your local sources:
$ git pullWhen your local sources are in a stable state, put them in the deposit:
$ git pushSynchronization
Install Rsync:
$ sudo apt install rsyncTo upload an exact copy a your development tree to the production server, run the following command:
$ cd /www; rsync -Catv --delete frasq www.frasq.org:www--delete removes files in the copy which are not in the source tree.
-C ignores the directories used by CVS, SVN or Git.
If there are other files or directories which you don't want to upload, create a file called exclude.rsync at the top of the tree, list the pathnames which Rsync must ignore, including exclude.rsync, and add the option --exclude-from=/www/frasq/exclude.rsync to the command line.
NOTE: Rsync uses SSH to transfer file. Remember to add you public in ~/.ssh.id_rsa.pub to the file ~/.ssh/authorized_keys on the remote system.
#
abort () {
echo $1 >&2
exit ${2-1}
}
usage () {
abort "$0 sitename"
}
if [ $# -ne 1 ]
then
usage
fi
host='www.frasq.org'
sitename=('frasq.org')
siteuser=('frasq')
siterdir=('/var/www/frasq.org')
exclude='--exclude .gitignore --exclude .settings --exclude .buildpath --exclude .project --exclude log --exclude tmp'
name=
user=
rdir=
for (( i = 0; i < ${#sitename[@]}; i++ ))
do
if [ $1 == ${sitename[$i]} ]
then
name=${sitename[$i]}
user=${siteuser[$i]}
rdir=${siterdir[$i]}
break
fi
done
if [ -z "$name" ]
then
abort "$1?"
fi
(cd /www; rsync -Catv --delete $exclude /var/www/${name}/ ${user}@${host}:${rdir}/)
Supervision
Download the source packages of the core and the plugins of Nagios. Install the necessary modules to compile the code:
$ sudo apt install openssl snmp snmpd libsnmp-dev ligd-devCreate a group nagios and a user nagios:
$ sudo addgroup --gid 300 nagios
$ sudo adduser --uid 300 --gid 300 nagios
Add the Apache user www-data to the group nagios:
$ sudo adduser www-data nagiosCompile and install Nagios:
$ tar -zxvf nagios-4.*.tar.gz
$ cd nagios-4.*
$ ./configure --with-httpd-conf=/etc/apache2/conf-available
$ make nagios cgis contrib modules
$ make all
$ sudo make install install-base install-cgis install-html install-config install-init install-commandmode fullinstall
$ sudo cp ./sample-config/httpd.conf /etc/apache2/conf-available/nagios.conf
$ sudo a2enconf nagios
NOTE: For an older version of Apache, copy the file httpd.conf in the folder /etc/apache2/conf.d.
$ tar -zxvf nagios-plugins-2.*.tar.gz
$ cd nagios-plugins-2.*
$ ./configure
$ sudo make install
The program is installed in the directory /usr/local/nagios. Check that the installation is operational:
$ /usr/local/nagios/libexec/check_http -H --ssl www.frasq.org
HTTP OK: HTTP/1.1 200 OK - 11192 bytes in 0.016 second response time |time=0.015749s;;;0.000000 size=11192B;;;0
To compile and install NRPE - Nagios Remote Plugin Executor, download the package from the page for the add-ons then search for the location of the SSL library:
$ sudo apt install apt-file
$ sudo apt-file update
$ apt-file search libssl|grep libssl-dev
Pass the directory of the library to configure:
$ tar -zxvf nrpe-3.*.tar.gz
$ ./configure --with-ssl --with-ssl-lib=/usr/lib/libx86_64-linux-gnu
$ make all
$ sudo make install
Edit the file /usr/local/nagios/etc/objects/contacts.cfg and modify the line which configures the email address used to send alerts:
define contact{
        contact_name                    nagiosadmin		; Short name of user
...
        email                           frasq
        }
Check the configuration:
$ sudo /usr/local/nagios/bin/nagios -v /usr/local/nagios/etc/nagios.cfgRegister the service:
$ sudo systemctl enable nagios.serviceStart Nagios:
$ sudo systemctl start nagiosCreate the password for the web interface:
$ cd /usr/local/nagios/etc
$ sudo htpasswd -c htpasswd.users nagiosadmin
$ sudo chmod 660 htpasswd.users
$ sudo chown nagios:nagios htpasswd.users
Make sure the cgi module is enabled:
$ sudo a2enmod cgiRestart Apache:
$ sudo systemctl restart apache2Enter http://localhost/nagios/ in the address bar of your navigator.
Enter nagiosadmin for the user name and the password you have defined with the command htpasswd.
Click on the link services in the menu on the left.
Try Imoin.
Backups
Install backup-manager:
$ sudo apt install backup-managerEdit the file /etc/backup-manager.conf:
export BM_REPOSITORY_GROUP="adm"

export BM_ARCHIVE_TTL="365"
export BM_ARCHIVE_METHOD="tarball-incremental mysql"

export BM_TARBALL_FILETYPE="tar.bz2"
export BM_TARBALLINC_MASTERDATETYPE="weekly"
export BM_TARBALLINC_MASTERDATEVALUE="5"

export BM_TARBALL_DIRECTORIES="/etc /var/www /home/frasq"
export BM_TARBALL_BLACKLIST=".git *.o"

export BM_MYSQL_SAFEDUMPS="true"
export BM_MYSQL_ADMINLOGIN="backupmanager"
export BM_MYSQL_ADMINPASS="backupmanager-password"
Adapt the parameters, in particular BM_TARBALL_DIRECTORIES and BM_TARBALL_BLACKLIST.
The MySQL DB is entirely saved with mysqldump.
Create a MySQL user called backupmanager with the privileges Selec_priv and Lock_tables_priv and a random password which you will copy in the parameter BM_MYSQL_ADMINPASS.
Create a script backup-manager with mode 755 in the folder /etc/cron.daily:
#!/bin/sh
# cron script for backup-manager
test -x /usr/sbin/backup-manager || exit 0
/usr/sbin/backup-manager
Check the execution times of the scripts cron.daily, cron.weekly and cron.monthly in /etc/crontab.
Add a file .backup-manager_my.cnf with mode 600 in root's home directory and in your home:
[mysqldump]
user="backupmanager"
password="mysql-backupmanager-password"
Quotas
Install the package for quotas:
$ sudo apt install quotaEdit the file /etc/fstab and add the options usrquota and grpquota to the filesystem:
/dev/sda2 /home ext4 defaults,usrquota,grpquota,relatime 0 2Remount the file system:
$ sudo mount -o remount /homeInitialize the quotas:
$ sudo quotacheck -avugDefine the quotas for a user or for a group:
$ sudo edquota frasq
Disk quotas for user frasq (uid 1000) :
  File system                  blocks        soft        hard    inodes     soft     hard
  /dev/sda2                     55188          0       1000000    1995        0        0
Check quotas:
$ sudo repquota /homeDNS
Install Bind:
$ sudo apt install bind9Edit the file /etc/bind/named.conf.local. Add a zone for the domain frasq.org and associate it to the configuration file /etc/bind/db.frasq.org.
NOTE: replace frasq.org by the domain name of your site.
zone "frasq.org" {
    type master;
    file "/etc/bind/db.frasq.org";
    allow-transfer  { isp-dns-ip; };
    allow-query { any; };
    notify yes;
};
The option allow-transfer lists the IP addresses of the servers authorized to copy the zone.
Replace isp-dns-ip by the IP address of the DNS server of your internet provider.
Edit the file /etc/bind/named.conf.options.
auth-nxdomain no;    # conform to RFC1035
listen-on-v6 { any; };
listen-on { any; };
allow-recursion { 127.0.0.1; };
allow-query-cache { 127.0.0.1; isp-dns-ip; };
additional-from-cache no;
Create the file /etc/bind/db.frasq.org with the following content:
; frasq.org
$TTL    3600
@	IN	SOA	primary-dns-hostname. root.frasq.org. (
			1 ; SERIAL
			3600; REFRESH
			15M; RETRY
			1W; EXPIRE
			600 ) ; Negative Cache TTL
;
; nameservers
;
frasq.org. IN       NS       primary-dns-hostname.
frasq.org. IN       NS       isp-dns-hostname.
;
; nodes in domain
;
www       IN A         primary-dns-ip
mail      IN A         primary-dns-ip
ns1       IN A         primary-dns-ip
smtp      IN A         primary-dns-ip
pop       IN A         primary-dns-ip
ftp       IN A         primary-dns-ip
imap      IN A         primary-dns-ip
frasq.org.	IN	A	primary-dns-ip
frasq.org.	IN	MX	10 mail.frasq.org.
;
; subdomains
;
*.frasq.org. IN A primary-dns-ip
Replace primary-dns-hostname by the name of the server, primary-dns-ip by the IP address of the server, isp-dns-hostname by the name of the DNS server of your internet provider.
Don't forget the . (DOT) at the end of name.
If you wish to keep the mail service of your internet provider, try the following configuration:
; frasq.org
$TTL    3600
@	IN	SOA	primary-dns-hostname. root.frasq.org. (
			1 ; SERIAL
			3600; REFRESH
			15M; RETRY
			1W; EXPIRE
			600 ) ; Negative Cache TTL
;
; nameservers
;
frasq.org. IN       NS       primary-dns-hostname.
frasq.org. IN       NS       isp-dns-hostname.
;
; nodes in domain
;
www       IN A         primary-dns-ip
mail      IN CNAME     isp-mail-hostname.
smtp      IN CNAME     isp-smtp-hostname.
pop       IN CNAME     isp-pop-hostname.
ftp       IN A         primary-dns-ip
imap      IN CNAME     isp-imap-hostname.
frasq.org.	IN	A	primary-dns-ip
frasq.org.	IN	MX	10 isp-mx-hostname.
;
; subdomains
;
*.frasq.org. IN A primary-dns-ip
Replace the different server names for each service by the server names of your internet provider.
If you want your DNS to support IPv6, add the following records:
;
; IPv6
;
www       IN AAAA      primary-dns-ipv6
ftp       IN AAAA      primary-dns-ipv6
;
frasq.org.    IN      AAAA    primary-dns-ipv6
*.frasq.org.  IN      AAAA    primary-dns-ipv6
;
Some internet providers require a proof that the server is authorized to manage the domain:
ownercheck IN TXT "isp-domain-key"For the verification of a domain by Google, use this format:
@ IN TXT "google-site-verification=..."IMPORTANT: Increment the serial number of the file every time it's modified.
Restart Bind:
$ sudo /etc/init.d/named restartCheck the configuration:
$ sudo named-checkconf -zTest the local DNS:
$ nslookup frasq.org localhostTest the DNS of your internet provider:
$ nslookup frasq.org isp-dns-hostnameTo check a TXT record:
$ nslookup -q=txt ownercheck.frasq.org localhostNTP
Install NTP:
$ sudo apt install ntpEdit the file /etc/ntp.conf. Add the time server for your zone - NTP Pool Project - before the already listed server:
# You do need to talk to an NTP server or two (or three).
server fr.pool.ntp.org
server ntp.ubuntu.com
Restart the NTP server:
$ sudo service ntp restartCheck that the time server is operational:
$ ntpq -p
     remote           refid      st t when poll reach   delay   offset  jitter
==============================================================================
*europium.canoni 193.79.237.14    2 u   99 1024  377    4.959   -0.200   0.005
Read the manual Write a CMS in PHP to learn how to structure the development of a web site.
Comments